
LOOKING FOR a fun craft the whole group will love? Try making these beautiful decorative egg ornaments! Bonus- they also make great gifts. All you need are a dozen eggs, glitter, glue, cotton balls, nail polish, nail scissors, and a few miniature decorations to add to the inside.

Step 1: Hollow Out Your Eggs
Carefully cut out a small hole into your egg. Drain the yoke into a bowl and save for a recipe (like Popovers!) With your finger, gently scrape out the membrane inside shell.

Step 2: Coat With Glue
Use a paintbrush to coat your eggs in glue. Coat the inside twice, and outside twice. Let each coat dry completely before applying a second layer. Drying can be tricky, so you’ll have to get creative! We put pencils inside a cup to hold the eggs up.

Step 3: Decorate The Outside
Coat the outside of the egg with paint. Nail polish works well, especially ones with a shimmer or glitter. Acrylic paint works too. Just make sure work in a well-ventilated area, the fumes can get potent. Pro tip- clear nail polish is great to add some shine to an uncolored egg.
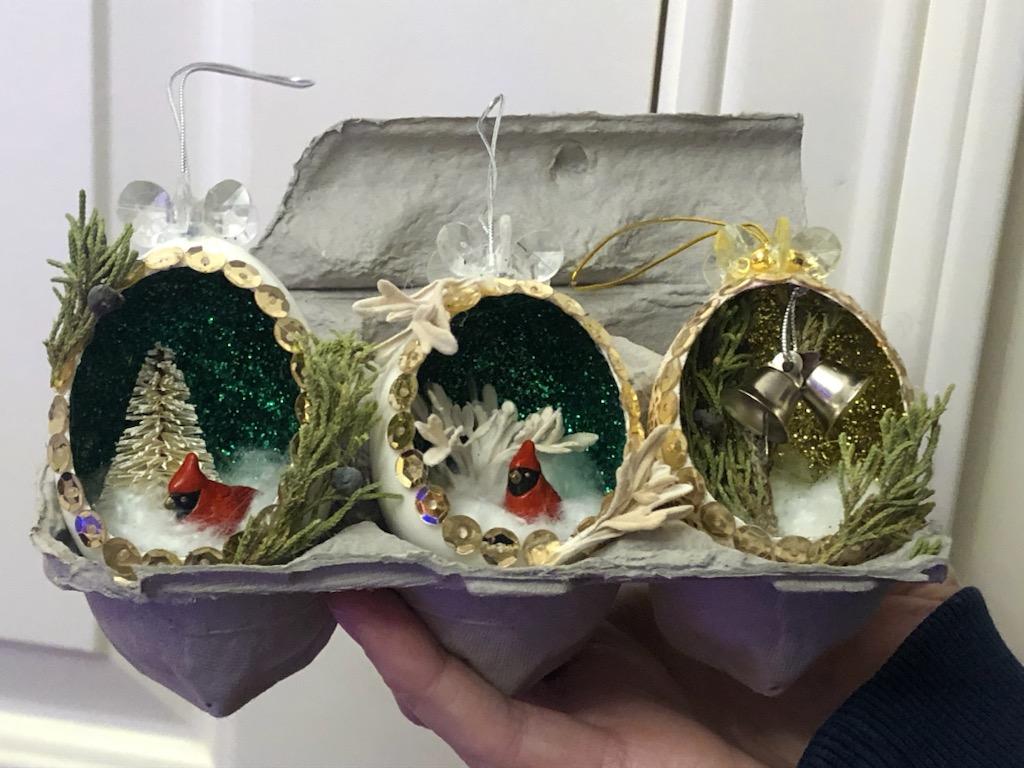
Step 4: Add Glitter To The Inside
Paint a layer or glue inside your egg, and then pour glitter inside. Gently swirl the glitter so that the entire inside is covered with a solid layer.
Step 5: Decorate The Opening
Now you can decorate the opening with beads, sequins, twill tape, or a rim of glitter secured by hot glue.
Step 6: Add “Snow” Inside
Take a cotton ball and break it apart to fluff it up a bit. Add a layer of hot glue inside your egg, at the base. Set the snow on top.
Step 7: Add Miniature Decorations
Set your scene with miniature decorations.
Step 8: Fasten String
Using decorative string, cut pieces about 5 inches long. Tie ends together in a knot, and glue to the outside of your egg at the top. If desired, add a bead to finish it off.
